
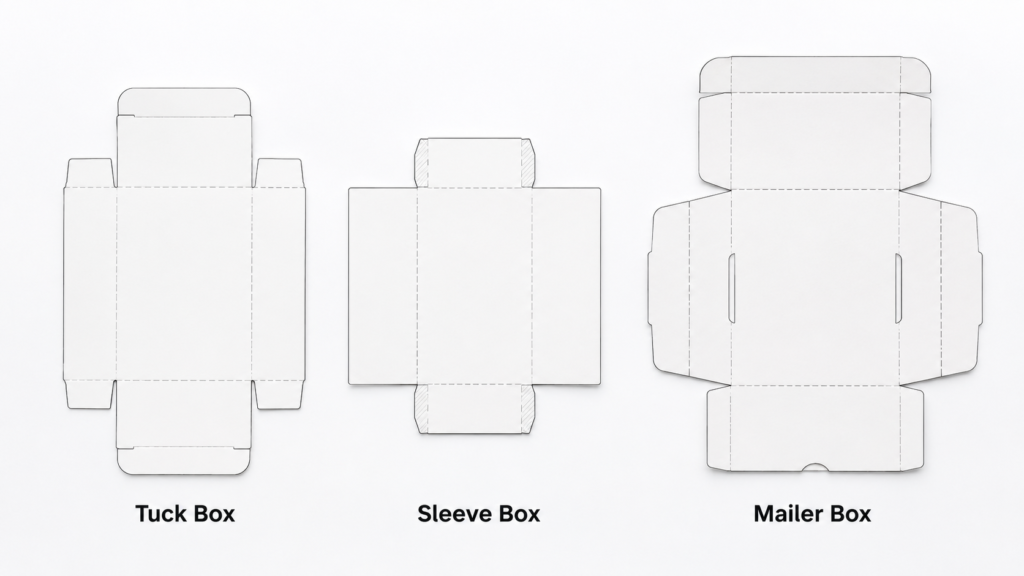
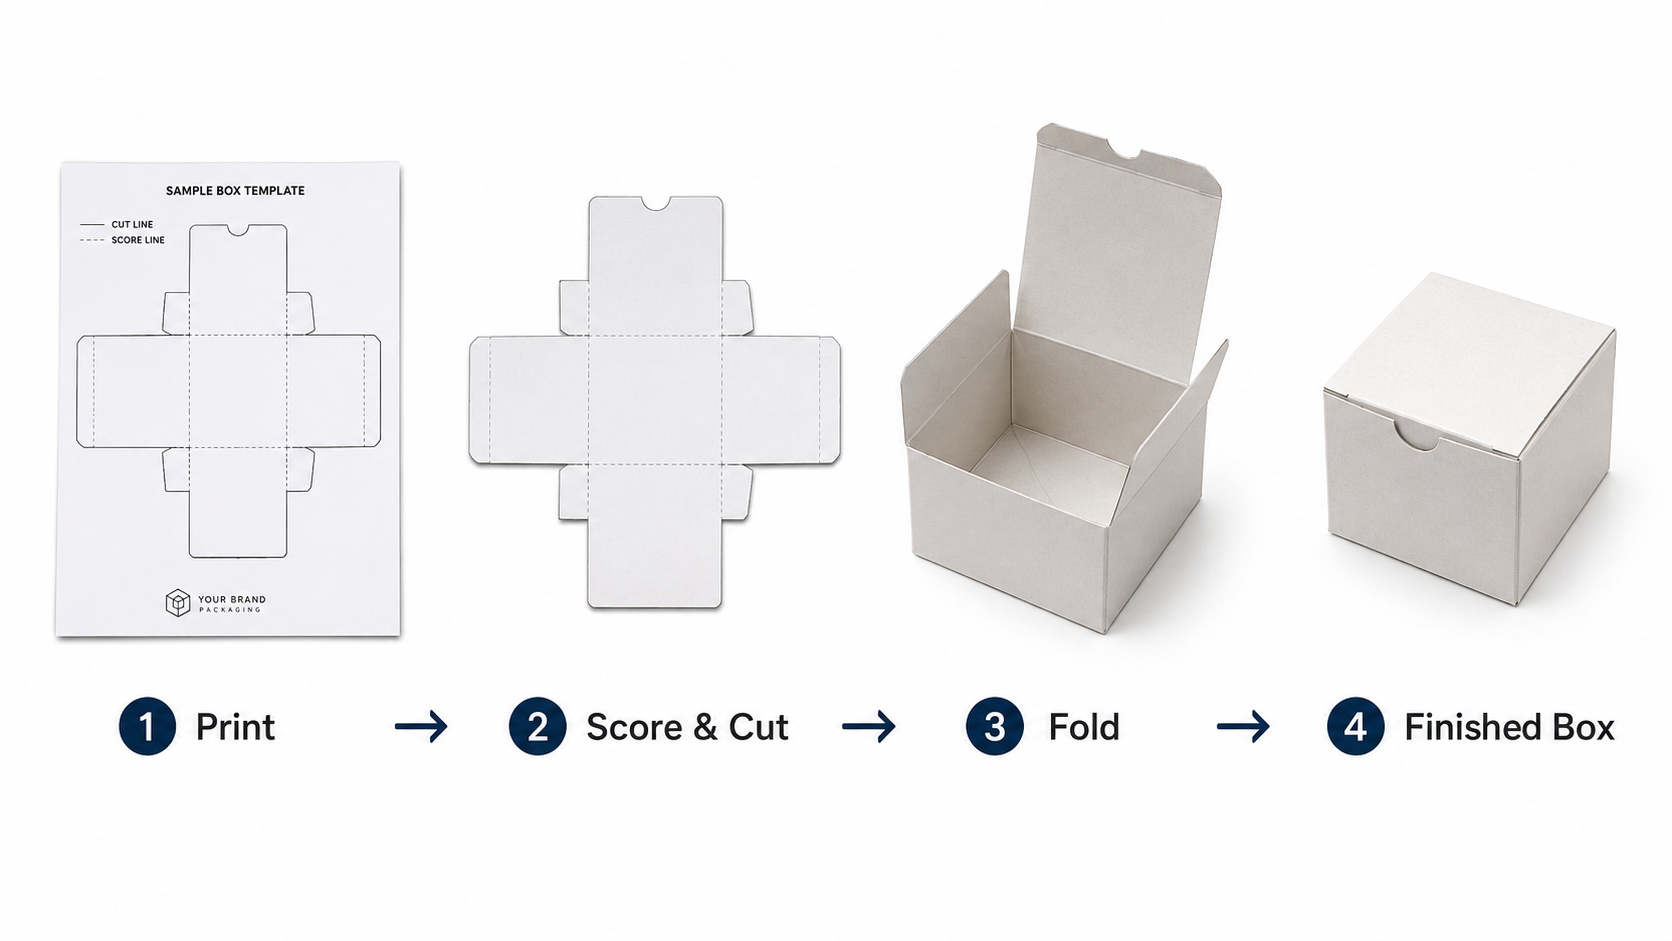
Every custom packaging box starts as a flat sheet of cardboard or paperboard that’s cut and creased into shape. The blueprint for that process — the exact cutting and folding pattern — is called a box template or dieline. Understanding how these work is essential for anyone designing, ordering, or approving custom packaging.
This guide explains what box templates are, how they’re structured, and how to use them effectively to produce packaging that’s accurate the first time.
What Is a Box Template (Dieline)?
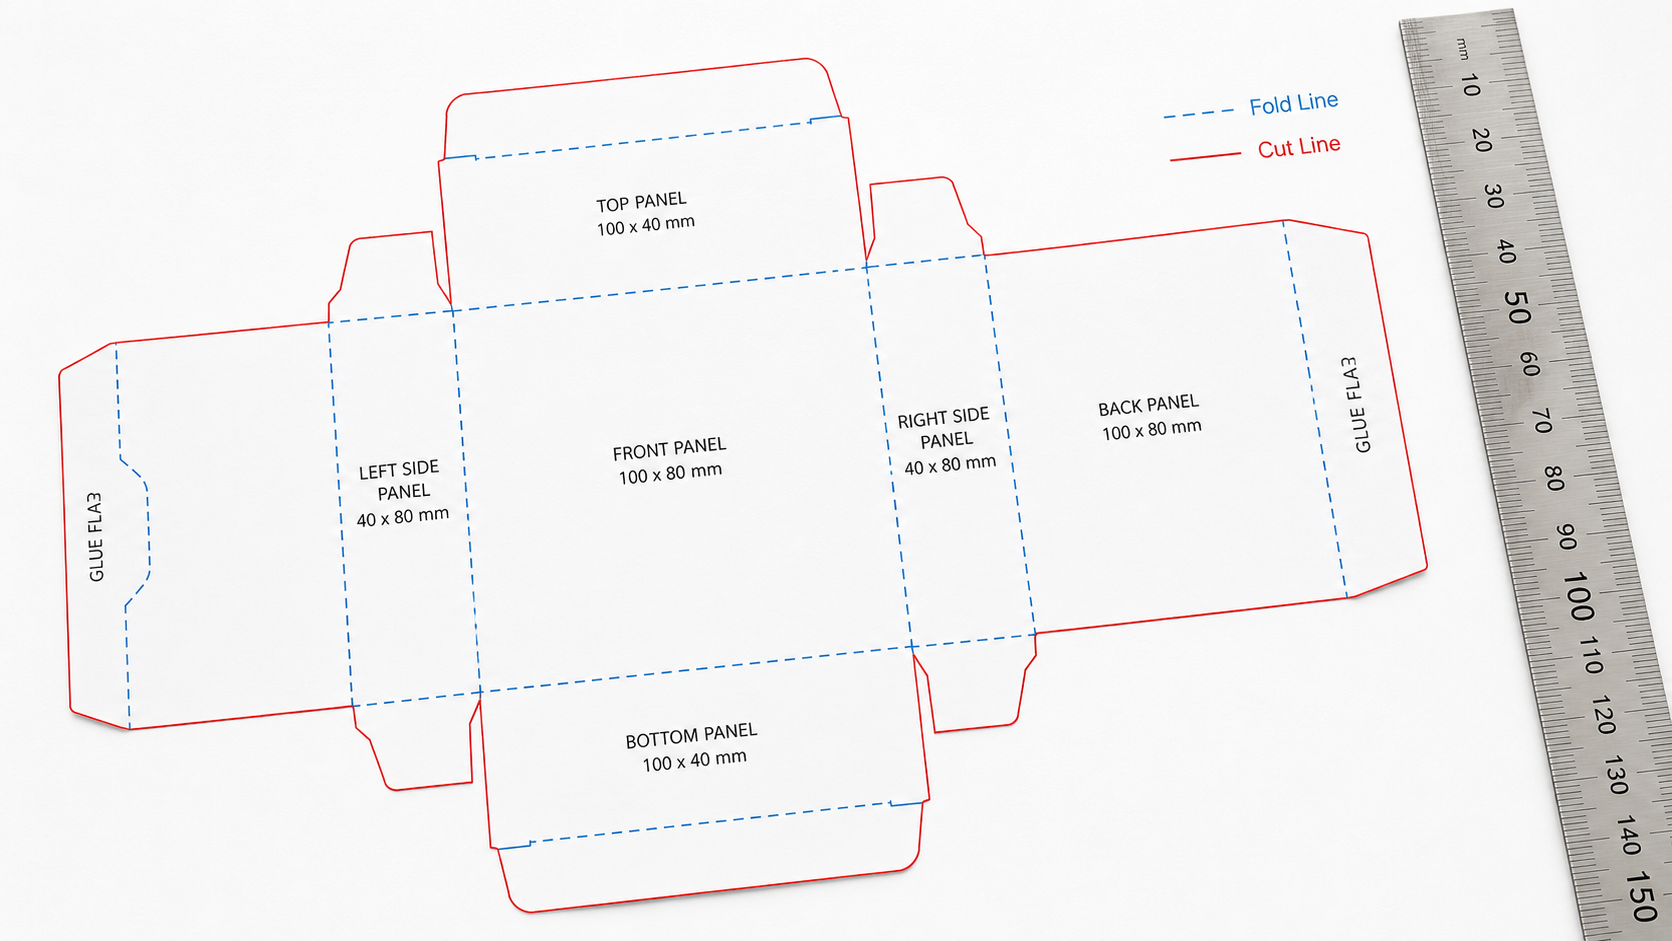
A box template — also called a dieline, structural template, or cut-and-crease template — is a two-dimensional flat layout that shows:
- Where to cut the material (cut lines)
- Where to fold the material (crease or score lines)
- Where to apply glue (glue flaps)
- The safe zones for artwork placement
- The bleed areas (extra artwork extending past cut lines)
When you unfold a physical box completely flat, you’re essentially looking at its dieline. The dieline is what gets sent to the die-cutting machine — a tool with sharp steel rules set in the shape of the template that stamps out the box shape from a sheet of material.
Key Elements of a Box Template
| Element | Usually Shown As | Purpose |
|---|---|---|
| Cut lines | Solid line | Where the material is cut all the way through |
| Crease/Score lines | Dashed line | Where the material is pressed to create a fold |
| Perforation lines | Dotted line | Where the material can be easily torn open |
| Glue flaps | Shaded area | Panels that are glued to assemble the box |
| Bleed area | Extended outline | Extra artwork beyond cut line (prevents white edges) |
| Safe zone | Inner boundary | Keep important content inside this line |
Why Dielines Matter So Much
Without an accurate dieline, your printed artwork won’t line up with the final box. Text might fall across a fold. Logos might get cut off. Colors might not bleed to the edge. A properly structured dieline ensures that your design intention translates perfectly to the physical packaging.
Most packaging print jobs fail or require expensive reprints due to artwork submitted against an incorrect or misunderstood dieline. Getting this right is critical.
How to Get a Box Template
Option 1: Request from Your Packaging Supplier
This is the easiest and most reliable method. Any reputable packaging manufacturer like PackPro will provide you with a dieline file for your specific box style and dimensions. The dieline is usually provided as an Adobe Illustrator (.ai) or EPS file with clearly labeled layers.
Option 2: Use an Online Dieline Generator
Several online tools allow you to input your box dimensions and automatically generate a dieline. Popular options include:
- Boxline by Packly — Free online dieline generator for common box styles
- TemplateBox — Offers downloadable templates for dozens of box formats
- Creativshop — Designer-friendly template generator with visual previews
Option 3: Create One Yourself in Adobe Illustrator
If you’re a designer with structural knowledge, you can create a dieline from scratch. This requires understanding the box style you’re designing, material thickness (which affects tab and flap dimensions), and precise measurement work.
How to Set Up Your Design on a Dieline
- Open the dieline file in Adobe Illustrator. The template will typically have locked layers for cut, crease, and bleed lines.
- Create a new layer below the dieline layer for your artwork. Never place artwork on the dieline layer itself.
- Extend your background colors to the bleed line — typically 3–5mm beyond the cut line. This ensures no white edges if the cut is slightly off.
- Keep all text and key imagery inside the safe zone — typically 3–5mm inside the cut line. Anything outside this zone risks being cut off.
- Avoid placing important content across fold/crease lines — text that crosses a crease will be distorted when folded.
- Use a 3D mock-up to visualize how your flat design will look assembled. Most designers use online 3D box preview tools or Illustrator’s 3D effect to check this.
- Supply final files with the dieline layer visible and artwork on separate layers, as a print-ready PDF or packaged AI file.
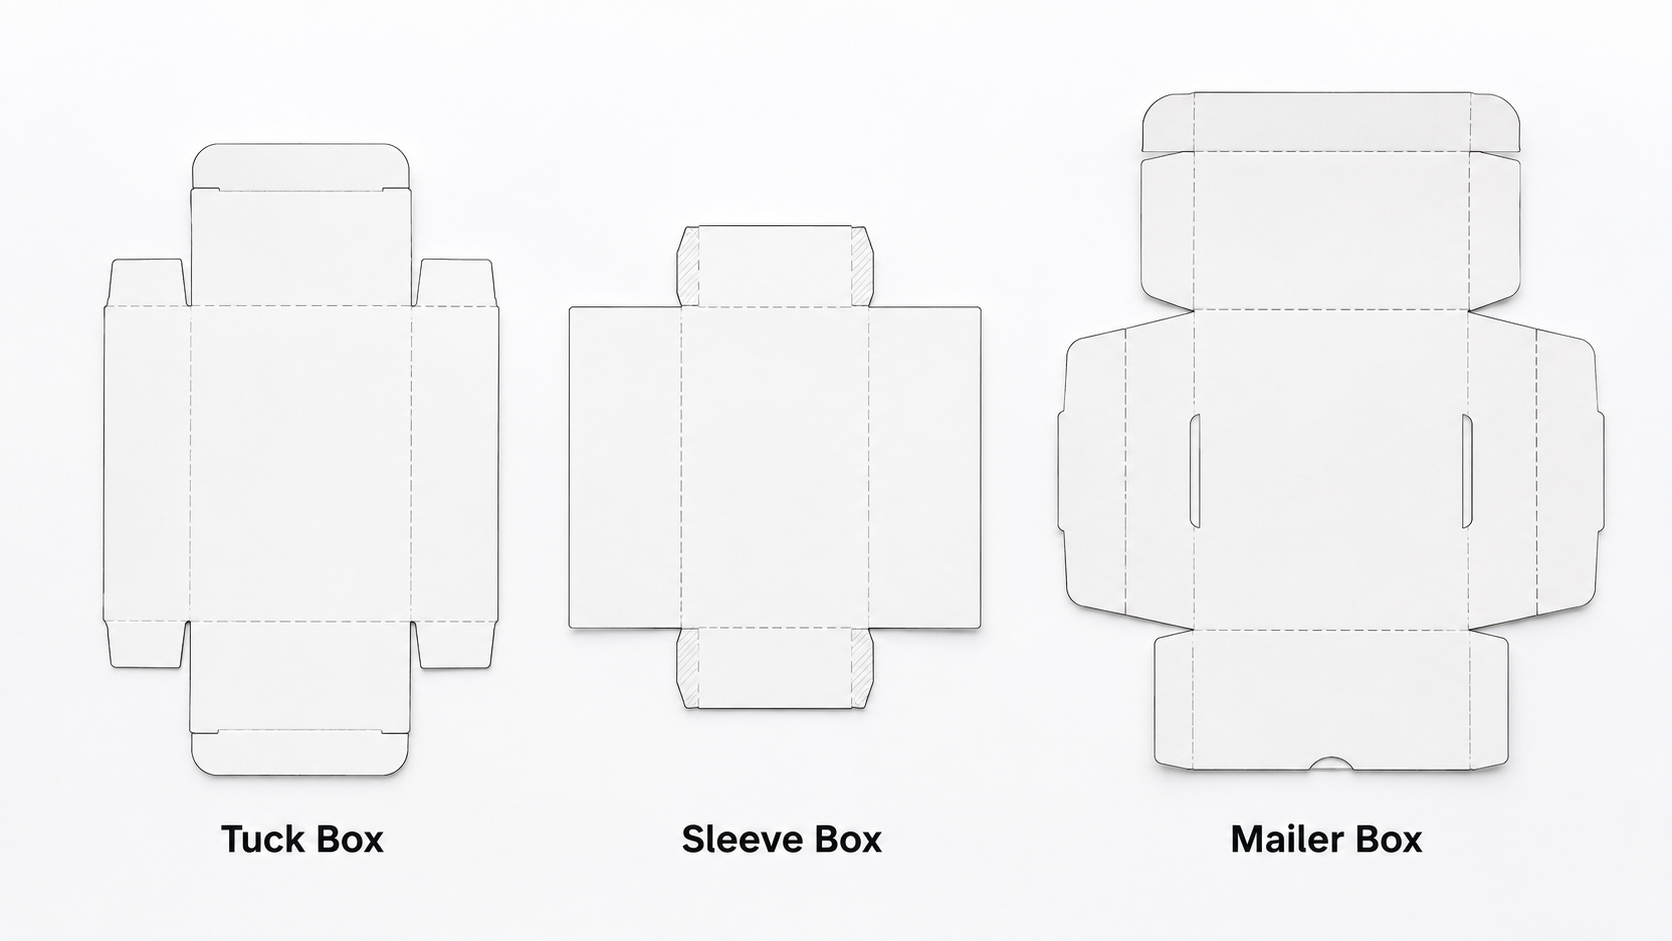
Common Box Template Styles
| Box Style | Template Complexity | Common Use |
|---|---|---|
| Straight tuck end | Simple | Retail product packaging |
| Reverse tuck end | Simple | General retail packaging |
| Auto-lock bottom | Medium | Food, heavy products |
| Pillow box | Medium | Gifts, small products |
| Gable box | Medium | Food, party favors |
| Rigid lid and base | Complex | Luxury products |
| Book-style box | Complex | Premium presentation |
Top Mistakes to Avoid with Box Templates
- Designing without the dieline — Never design packaging artwork without first placing it on the correct dieline
- Forgetting the bleed — Always extend background colors and patterns to the full bleed line
- Placing text across folds — Text on a fold line will distort when the box is assembled
- Using a dieline from a different size — Even a few millimeters difference makes artwork unusable
- Sending artwork without the dieline included — Always include the dieline in your file submission so the printer can verify alignment
Final Thoughts
A box template is the foundation of any successful packaging project. Get it right, and your design will translate perfectly to the physical box. Get it wrong, and even the most beautiful artwork will result in unusable packaging.
When you work with PackPro, we provide accurate dieline files for every box style and handle all the structural specifications so your team can focus on the design. Contact us today to start your project with the right template from day one.
Related Reading
- What Are Tuck Boxes? A Simple Beginner’s Guide
- Advantages of Folding Boxes
- What Does Collate Mean in Printing?
Frequently Asked Questions
What is the difference between a box template and a dieline?
The terms box template and dieline refer to the same thing — a flat, two-dimensional layout showing where a box should be cut, creased, and glued. The term “dieline” is more common in professional print and packaging contexts, referring to the die-cutting tool used to stamp out the shape. Both terms describe the structural blueprint that your artwork must be designed against.
What file format should a box template be provided in?
Box templates are most commonly provided as Adobe Illustrator (.ai) or EPS files, with separate locked layers for cut lines, crease lines, bleed areas, and safe zones. These vector formats allow designers to place artwork at exact scale without distortion. Some suppliers also provide PDF dieline templates, though Illustrator format is generally preferred for live design work.
How much bleed should I add to a box template design?
The standard bleed for packaging artwork is 3–5mm beyond the cut line on all sides. This extra artwork ensures that if the die-cut is very slightly off position, no white unprinted edges will appear on the finished box. Your packaging supplier will specify the exact bleed requirement for your particular job, and it is always clearly marked on the dieline file they provide.
Can I use the same box template for a different size box?
No — box templates are specific to exact dimensions and cannot be reused for a different size. Even a difference of a few millimeters in length, width, or height requires a completely new dieline, because all the panel proportions, flap sizes, and tab dimensions change with the box dimensions. Always request or generate a fresh template for each new box size you produce.
What happens if I design packaging without using a proper box template?
Designing without a proper dieline almost always results in artwork that doesn’t align correctly with the finished box — logos or text may fall across fold lines, important content may be cut off, and backgrounds may not bleed to the edges. This typically requires an expensive reprint and causes significant production delays. Always obtain the correct dieline from your packaging supplier before starting any artwork.